Porchetta-Style Turkey and Fennel
1/7/2023 | 26m 45sVideo has Closed Captions
Turkey Breast, Roasted Fennel with Orange-Honey Dressing and smart oven reviews.
Test cook Dan Souza makes hostJulia Collin DavisonPorchetta-Style Turkey Breast.Equipment expert Adam Riedreviews smart ovens.Testcook Keith Dressermakeshost Bridget Lancaster Roasted Fennel with Orange-Honey Dressing.
Problems with Closed Captions? Closed Captioning Feedback
Problems with Closed Captions? Closed Captioning Feedback
America's Test Kitchen is presented by your local public television station.
Distributed nationally by American Public Television
Porchetta-Style Turkey and Fennel
1/7/2023 | 26m 45sVideo has Closed Captions
Test cook Dan Souza makes hostJulia Collin DavisonPorchetta-Style Turkey Breast.Equipment expert Adam Riedreviews smart ovens.Testcook Keith Dressermakeshost Bridget Lancaster Roasted Fennel with Orange-Honey Dressing.
Problems with Closed Captions? Closed Captioning Feedback
How to Watch America's Test Kitchen
America's Test Kitchen is available to stream on pbs.org and the free PBS App, available on iPhone, Apple TV, Android TV, Android smartphones, Amazon Fire TV, Amazon Fire Tablet, Roku, Samsung Smart TV, and Vizio.
Providing Support for PBS.org
Learn Moreabout PBS online sponsorship♪♪ ♪♪ ♪♪ ♪♪ ♪♪ -Today on "America's Test Kitchen," Dan makes Julia porchetta-style turkey breast, Adam reviews smart ovens, and Keith makes Bridget roasted fennel.
It's all coming up right here on "America's Test Kitchen."
"America's Test Kitchen" is brought to you by the following.
Plugrà European-style butter was created for all chefs, cooks, and bakers.
Slow-churned with 82% butterfat for a smooth texture and more pliability for flaky crusts.
Plugrà -- from professional kitchens to your home.
Sailing with American Queen Voyages brings you to mighty rivers and unique expeditions, where passionate explorers can discover the continent of North America.
You can learn more about our voyages at AQVoyages.com or contact your travel advisor.
Sur la Table, where you can discover an assortment of provisions for your next meal or gathering, from cookware and tools from a wide variety of kitchen brands to hands-on cooking classes.
Visit us at surlatable.com.
♪♪ -If you ask 10 chefs how to cook the perfect Thanksgiving turkey, you'll probably get about 20 different answers.
But today, Dan's gonna show us a new approach to a holiday-worthy turkey centerpiece.
-So, Julia, there are a million ways to cook turkey out there.
You're totally right about that.
This one is really different.
I don't think most people would see this coming, but we're actually gonna take the flavors and the style of porchetta, which is an unbelievable roast.
-Mm-hmm.
-Right?
So it's pork.
You get crispy skin on the outside.
Sometimes it's done with a whole pig.
And we're gonna apply that to a turkey breast.
-I love it.
-So let's start with the flavors that we're gonna work with.
We're gonna start with some spices.
One tablespoon of fennel seeds.
It's a very key flavor.
I also have 2 teaspoons of black peppercorns.
We're gonna go into our spice grinder here.
You can also do this in a mortar and pestle, but I feel like this gets the job done really quickly.
So that looks good.
Nice and finely ground.
Straight into our food processor.
We're gonna use our food processor to put together the rest of the paste.
And we have lots of herbs, so I have 1/4 cup of chopped rosemary.
-Mmm.
-And here's where things take a very Thanksgiving turn.
This is not traditional in porchetta flavoring at all.
It's sage, but it, like, just screams Thanksgiving.
-Sure does.
-So 1/4 cup of chopped sage leaves.
We've also got 1/4 cup of chopped thyme.
Also have six cloves of garlic just chopped really roughly.
And then 4 teaspoons of kosher salt.
Alright.
So I'm gonna pulse for about 15 to 20 seconds just to get everything chopped up.
Okay, that looks great.
And then I have 3 tablespoons of extra virgin olive oil, which I'm just gonna add through the tube here.
So I'm gonna process this for about 20 to 30 seconds until we get a nice paste.
Okay.
This looks great.
Alright.
So I'm just gonna transfer this to a large bowl here.
Now, turkey time.
We have a beautiful crown here.
This is about 7, 8 pounds.
So I'm gonna get this over on my board.
So the first thing we're gonna do is grab some good kitchen shears.
And we're gonna take off this back portion here.
-Mm-hmm.
-So there's a really nice line right here of fat that shows you nice definition between the breast and the back.
Alright.
So I'm gonna use some nice shears to cut through here.
It's the perfect tool for the job, and really good ones make such a difference.
So now that I've done that, we're gonna bend this back.
And we're gonna pop some joints.
So that is a good sound.
And then I'm just gonna keep using my shears.
And you can kind of see where it starts to separate and just cut right through.
And then we have this really nice piece.
-Ooh, for gravy.
-Yeah, for gravy, for stock.
It's fabulous.
So we're gonna get a lot of good stuff like that.
So we save that.
We're gonna take all the meat off and then actually wrap it in the skin.
-Oh.
-We're gonna get skin in every bite.
It's gonna get all crispy.
And so the key to that is to actually remove all of the skin from the breast.
I'll try to do it in one nice, big piece.
You really don't want to rip the skin because that's gonna be key to the rest of the recipe here.
When I get little bits of membrane like that that are holding it on, if I'm pulling too hard and it feels like I might rip it, I'll just snip it.
It's not hard.
It just takes a little bit of time to do it.
And the end result is just -- It's so worth this effort.
Now we're gonna butcher this down.
And what we really want to do is take off each breast.
-Mm-hmm.
-So we want to look for the keel bone right here.
And we're gonna go just to the right of it for the side over here.
This doesn't have to be beautiful and perfect because you won't even tell on the final product.
Use your fingers to separate so you can get a really good look at what's happening.
I'm using a boning knife for this.
You can absolutely use your chef's knife, you know, if it's nice and sharp.
So right around there.
So we got a beautiful breast.
-Perfect.
-I'm gonna repeat the exact same thing just on this side.
Okay, so now that we have the breasts taken off, we're gonna do a little bit more butchery here.
And first thing is to take off the tendies.
-[ Laughing ] You mean the tenderloins?
-I mean the tenderloins.
So, you know when you're working with chicken breasts and, like, all of a sudden, they're two pieces?
-Yeah.
-The tenderloin just really wants to come off.
-Yep.
-It's barely held on over here.
And you just need a simple cut along this line to get it off.
So this right here is not gonna tenderize during cooking, so we're gonna get out as much of it as we can.
Great.
Okay.
We got rid of that.
So the final bit of butchery that we're gonna do is to make this really even thickness.
So what we're gonna do is start with the knife here.
I'm gonna open this up, gonna butterfly it.
It's gonna stop about an inch over there.
But I'm gonna start at the same height as the breast here.
-Interesting.
I've actually never seen it half butterflied like that before.
That's very clever.
-Nice little trick.
-Yeah.
-So we go.
Okay, great.
And that second one is done.
This is all the butchery we have to do.
So I'm gonna get cleaned up a little bit, and then we'll assemble the roast.
Now it is time to put everything together into this gorgeous roast.
I have my paste from earlier, and I'm gonna add all of my turkey pieces here.
We're gonna try and get it all coated nice and evenly.
This is what I've always wanted to do to turkey.
You know, like, season it inside and out.
It doesn't work when it's all whole.
This looks perfect.
I'm gonna set this aside here.
And now we're gonna deal with the skin.
So we've got it right here.
The first step is we want to pat it nice and dry.
We know dry is really important for any time we're roasting.
And I'm gonna pat this side dry specifically.
This is the exterior... -Mm-hmm.
-...which is gonna be on the outside, and then the other side is gonna help us just with ease of use as we're kind of going through.
Great.
Okay.
So now this is our opportunity to remove any fat pockets and things like that that we kind of brought with us in the other process.
We really want the skin to get nice and crispy.
The parts that have fat pockets underneath the skin doesn't get as crispy.
Okay, now it is time to put our turkey on here.
So what we're gonna do is start first with the breasts.
I'm gonna put one right here, so on the kind of left side.
So we're gonna roll it up this way.
So I have it facing long way here, and I want the skinny part facing me here.
And then I'm gonna go with the other breast.
And so I'm gonna do the opposite here where the really thin end is down there.
-And space in the middle.
-Yeah, a little bit space in the middle, and that is for our tenderloins.
So here we're gonna go thick part out, thin part in.
We're actually gonna overlap the thin parts.
Alright.
And the first step here is to kind of roll it up and we're gonna get a look at how we're doing, what the shape is.
And you can use the skin to do just that.
Okay, good.
So that is our rough shape.
And we're gonna use twine to accomplish everything else here.
-Okay.
-These are about 16 inches long, and I'm starting about an inch in from the side and then I'm gonna space them out nice and evenly and I want five in the middle.
And so we want, you know, about an inch on both sides.
And these two are actually gonna help us set the shape.
So we're gonna go with those first.
-So you're starting on the ends.
-Yes, starting on the ends, exactly.
-Double knot?
-Yes.
So I like to loop it under twice.
It holds it in place for me.
So we've set our shape nicely there and we go with the middle one.
Alright.
So I'm gonna finish the rest of these up and really set the shape.
So our roast is looking good.
It's almost all the way tied up.
So this is a longer piece.
It's about 30 inches long.
And what I'm gonna do is first tie it off to one of the strings, the furthest one here.
And so what we're gonna basically do is go over and then under each of these strings.
-Mm-hmm.
-Tighten it up and then just continue down.
This is gonna cinch the whole thing together.
Okay.
So, I made it to the end of this side.
What I'm gonna do is go over this, tuck in as much as I can, flip it over to the other side.
I'm gonna do the exact same thing on this side as well.
We'll go back to the other side, and we'll tie it right off to where we started.
Beautiful.
I'm gonna just trim this little guy off here.
-Gorgeous.
-And there we go.
We've got our beautiful tied roast.
So we've done all of our fabrication.
From here, it's just Easy Street.
So I've got an interesting setup here.
This isn't just any wire rack set in a baking sheet.
And you can see that the foil looks really different here.
And so what I basically did was crumple it up into a ball and then spread it back out.
-Oh, so that's on purpose?
-That is on purpose.
And this is a really great technique any time you're roasting and you want to limit the amount of smoke that happens in the oven.
So underneath here, there's tons of air, small pockets of it, but it's an insulator.
So as the drippings come down, they're not hitting a really hot pan and then, you know, vaporizing.
And then I put the rack on top and sprayed it with a little bit of cooking spray.
-That's very cool.
-You don't want this to stick to it after all that hard work.
-Yeah, true.
-The last step is a little coating of kosher salt.
Just get it nice and crispy.
This is about 2 teaspoons.
Alright.
Beautiful.
So this is gonna go into the fridge uncovered.
We want lots of air circulation and drying to happen.
And we need to do it at least eight hours, which allows all the seasoning to happen.
But you can do it up to two days in advance.
Alright, so this roast doesn't look great right now, but this is exactly what we want before it goes into the oven after coming out of the fridge.
And you can see that the skin is nice and dry.
-Mm-hmm.
-It's been hanging out in there uncovered for about a day.
So right before roasting, we're gonna brush it with 2 tablespoons of melted butter.
And the extra fat obviously helps conduct a lot of heat to the surface, so we'll get beautiful browning.
-Mmm.
-Alright, I'm gonna pop this in a 275-degree oven on the upper-middle rack.
-That's really low.
-It is pretty low.
This is the initial cooking that we're gonna do, and we want to get this nice and evenly cooked from the center to the outside.
Lower oven really helps with that.
In this first part of cooking, bringing it to an internal temperature of 125 degrees.
That'll take about an hour and a half to an hour and three quarters.
-Okeydoke.
-Okay.
So it's been about an hour and a half.
This isn't a looker right now.
-It really isn't.
-It's not a looker at this point.
I'm looking for 125 degrees.
So 125 degrees.
We still have a lot of cooking to do.
But what's really nice is we've set the shape of the turkey at this point, so we can get rid of the twine now.
As soon as that hits 500 degrees, we're gonna go back in, and we're gonna get this thing beautifully burnished.
Alright.
This is my favorite part.
-Oh, goodness, Dan.
-Check this out.
-That's beautiful.
-Isn't it?
-You can hear it sizzling.
-Yeah.
No smoke, though.
Notice that.
-True.
-Alright.
-Oh-oh, gorgeous.
-Doesn't it look great?
So it's been in there about 20 minutes now, and we're looking for 145 degrees in the center, which might sound low, but we just blasted it with a lot of heat and it's gonna do a lot of carryover cooking.
And so perfect.
We're right at 145.
So we're gonna transfer it right over to our carving board.
-Goodness.
How long do we have to wait?
-So we've got to lightly tent it with foil.
I'm gonna let this rest for about 30 minutes.
And that is key because that's where all that carryover cooking is gonna take place.
And we'll hit right around 160, 165.
That's gonna be gorgeous.
-Alright.
-Alright.
It is the best part of this recipe, for sure.
Look at this gorgeous roast.
-It's beautiful.
-It's been resting for about 30 minutes at this point.
-Mm-hmm.
-And now it is time to slice.
I'm gonna do about half-inch slices, nice and big, meaty ones.
We've done all the work ahead, and you just slice and serve this gorgeous thing.
Can you see how juicy that is?
-Oh, yes.
That is beautiful.
It almost looks marbled with the paste all in between the pieces of meat.
-There won't be an underseasoned bite.
-Beautiful.
I've been waiting a while to taste this.
-I know.
Thank you for being patient.
I think you'll be rewarded with that patience.
-That's spectacular.
-So good, right?
-The meat has so much flavor.
It's juicy and moist.
And I love the flavor of the herbs inside.
The rosemary is kind of a lovely surprise.
-Isn't it nice?
-Yeah.
-And sage really makes it taste like Thanksgiving.
Everything should be this shape for cooking, right?
Because it just heats so evenly.
-Mm-hmm.
-That's so not the case normally for turkey.
So it's really nice.
Nice change of pace.
-Dan, this is spectacular.
Thank you.
-You're welcome.
-So if you want to try something new this Thanksgiving, start by deboning a turkey breast and rubbing it with an herb paste.
Then strategically reassemble the meat into a tidy roast and let the carryover heat finish cooking the turkey as it rests.
From "America's Test Kitchen," an inventive new recipe for porchetta-style turkey breast.
I just love how this looks.
-No gravy needed.
-No gravy needed.
♪♪ Smart ovens are one of the cool, new kitchen appliances on the market these days, which begs the question, Adam, what exactly is it that makes them so smart?
-More brain power than you or me combined.
-Really?
-You know, I knew the moment was coming.
My phone is smarter than I am.
My TV is smarter than I am.
Now the ovens are smarter than I am.
These things will operate like a regular countertop toaster oven, but they do so much more.
-Okay.
-We tested a lineup of five of them.
They are not cheap.
The top price was about $1,100.
-[ Whistles ] -Bottom was about $300.
And you can use them like a regular countertop oven, but they do all kinds of cool tricks.
They will monitor the temperature and the timing of your cooking as it progresses and make adjustments for you.
There are cameras inside so you can see the food while it cooks.
It will give you graphs of what's going on.
You can put food in there, either packaged food or meal kits from the companies or even some fresh foods.
It will recognize what's in there and start cooking, like, just a one-touch thing.
They have apps so you can operate them remotely or see the cooking that's going on on your phone from across town.
And they all connect to something like Google Assistant or Alexa or Siri.
So when you're home, you can operate them by voice.
-[ Laughs ] That is pretty cool.
-Testers identified a few factors that were important regardless of the oven.
One was good, clear, intuitive controls, both for the oven itself and for the app.
You want to be able to use it easily without thinking too hard.
Believe it or not, they like ovens that can make great toast.
-[ Laughs ] -And they also liked ones that were easier to clean, that had smudge-free exteriors and, last, a smaller footprint.
-Mm-hmm.
-Because look at this thing.
You know, some of them are pretty big.
They take up a lot of space on your counter.
-How does it adjust for cooking if it's overcooking or undercooking?
-Well, it's got a built-in temperature probe that you have put into the food and you program in the finished temperature that you're after.
So that's how it monitors things and makes adjustments.
It knows what temperature the food is.
-That makes sense.
-Of the five that we tested, we have two here.
These are the two winners.
-Okay.
-The one right by you is the third generation of the June Smart Oven.
-Okay.
-And this thing was a wonder.
Testers loved it.
It has all of those tricks that I mentioned before and all of the basics.
It did a great job roasting, baking, toasting.
It air-fries, it dehydrates, it broils.
All of the food the testers made in this oven came out really good.
-Wow.
So that replaces a lot of appliances.
Air fryers and dehydrators -- those are really specific.
-Now, you pay dearly for this.
This one was $1,000 for the premium package.
-Gotcha.
-But I'll tell you, testers did not want to give it up.
And one of the testers, in fact, bought one for herself at the end of this.
-Wow.
That's high praise.
-It was.
This one is a best buy.
This is the Tovala Smart Oven.
-Mm-hmm.
-It did all the same tricks.
All of the recipes came out well.
The one little quibble with this is that its footprint was a little too compact so that the inside was kind of cramped.
You could just squeeze in a butterflied chicken, but you couldn't do any more ribs than half a rack at once.
-Oh.
-So if you're a smaller household... -Yeah.
-...this one would be fine.
And it's a lot less expensive at $300.
-Wow.
Interesting, Adam.
Thank you.
-Smarter than us, Julia.
-Sounds like it.
So there you have it.
If you want an oven that is smarter than you, there are two you should check out.
The first is the June Smart Oven, the third generation, at about $1,000.
And our best buy is the Tovala Smart Oven at about $300.
♪♪ -What are your thoughts on fennel?
I happen to love the stuff for its distinctive flavor, but I know that some of you are fennel adverse.
So Keith is here, and he's got a great method that might convert some of the fennel hesitant, shall we say?
-Fennel hesitant.
I like that.
So today we're gonna roast fennel, which tempers that licorice flavor that some people don't like and turns the bulb sweet and nutty.
It's a real treat.
So first we're gonna prep our fennel.
So I have two bulbs of fennel here.
These are about, oh, about a pound each or so with -- with the fronds on.
But the fronds are important before we prep them.
We're gonna take some of these off, and we're actually gonna chop these and use it as a garnish.
So with roasting, the name of the game is surface area, right?
The more surface area you have, the more browning that you have.
We tried a bunch of different ways to prep this fennel.
We tried it in rounds and -- and sliced, and, you know, the best way was actually turn it into wedges.
-Hmm.
-Slices fall apart if you don't keep the core in there.
And if they're too thin, they dry out in the oven.
You get, like, these fennel chips.
Not that appealing.
-Not great.
-So first step is just to take off the fronds here.
And then I'm gonna take the bottom off just a little bit.
Usually that can get dried out, so you just want to shave that off.
Then I'll stand it up.
I'm gonna cut this into eight wedges, so in half first.
And it's important to keep this core in, right?
Take the core out, you have layers that are all over the place.
-Right.
-Gonna keep it in there.
So quarters and then into eights like that.
Okay.
-Lovely.
-Those are our fennel wedges.
Now, I have 2 tablespoons of water.
The water is gonna help create some steam while it's roasting, but there's also another function that it's gonna do.
I'm gonna take 1 teaspoon of kosher salt, and I'm gonna whisk that in this water.
That salt is gonna dissolve.
And then when we toss the fennel in this water, that salty water is gonna get in between the layers and season the wedges.
So you don't have salt on the outside.
You're actually just gonna have salt on the inside.
I'm gonna be fairly gentle when I toss this because I don't want to break up the pieces too much.
Okay.
Looks like that is well coated.
And now a couple more things.
I have 3 tablespoons of vegetable oil... -Okay.
-...and 1/4 teaspoon of pepper.
And I'm just getting that pepper mixed in, getting the oil mixed in there.
That looks great.
So now for roasting.
Pretty standard method here.
Time to get these onto a tray.
I have a rimmed baking sheet here, which I've sprayed with vegetable-oil spray to make sure that the fennel doesn't stick.
And the placement is somewhat important here.
I'm gonna arrange the fennel on the two long sides because that's where the pan is gonna see the most heat.
Okay.
Now I want to take any liquid and oil in the bottom of this bowl and drizzle it over the fennel... -Mmm-mmm.
-...like so.
One more thing before we roast.
I'm gonna cover this with some foil.
So that water that's in that fennel will create steam and help soften and evenly cook it.
So we're gonna go into a 450-degree oven on the lower-middle rack.
And I'm gonna keep this covered for 20 minutes.
-Okay.
-It's been 20 minutes, and the fennel should be nicely softened now.
Carefully take this foil off.
We want to make sure you see that it's already started to brown just a little bit.
Now that the foil is off, we're gonna continue on and make sure that that cut side is evenly browned, which will take five to eight minutes.
-What a gorgeous aroma.
-So that's gonna finish browning.
We're gonna make a quick dressing that will complement the fennel and just add a little bit of color, a little bit of complexity.
-Great.
-So I have 1 tablespoon of extra virgin olive oil in this bowl.
Gonna add 2 teaspoons of honey.
-Yes, darling?
[ Both chuckle ] -1 1/2 teaspoons of white wine vinegar for some acidity.
I have a tablespoon of orange juice, 1/8 teaspoon of orange zest.
-Mmm.
That's great with the fennel.
-Yeah.
Orange and fennel is a classic and great combination.
And just a pinch of kosher salt.
I'm just gonna whisk that together with my little mini whisk until that honey is dissolved in there and we get that zest incorporated.
Simple as that.
-Lovely.
-One last thing.
Remember those fennel fronds that we saved earlier?
I'm gonna coarsely chopped these.
-Mmm.
-So we're looking for about 2 tablespoons.
We have our fronds and our dressing.
We just have to wait for the fennel to finish roasting.
It's been eight minutes, and I've rotated this halfway through to make sure that we have even browning.
Smells great.
It's sizzling.
So now I'm just gonna take these, flip them over, make sure we get that second side browned.
-I cannot wait to see this.
-Look at the color on it.
-Oh, yes.
Lovely.
-Now I'm gonna go back into the oven.
Make sure that the second side gets brown.
That will take three to five minutes.
-Okay.
-Okay.
It's been three minutes.
And our fennel is golden brown on all sides now.
Smells even better... -Ohh!
-...than it did a couple minutes ago.
-[ Gasps ] Hello, fennel.
-So I'm gonna transfer this over to a platter.
It's so tender.
Just, the pieces are barely holding together right now.
-So am I.
Even aromatically, it just takes on a whole other flavor.
Caramel notes that you don't get with fresh fennel, which is delightful.
But this is a whole different animal here.
-It still has that kind of licorice aroma to it, but it's definitely sweeter and milder and nuttier.
Drizzle this right over our fennel.
-Oh, how beautiful.
-Oh, you can smell the heat kind of coming off and releasing that orange flavor in our fennel fronds.
-That's what fronds are for.
-[ Chuckling ] You were waiting to say that, weren't you?
-All day.
-Okay, let's eat this.
-Please.
-Three wedges for you.
-Lovely.
-I'm gonna go for the core.
That's the best part, I think.
-Oh.
Alright.
-Not gonna mess around.
-[ Laughs ] -So soft and tender.
-I know what you were saying about nutty.
Almost a hazelnut flavor to it.
-That's right.
-Yeah.
Mmm.
It's so tender.
-Yeah.
And when it's raw, fennel can be really stringy.
-Mm-hmm.
-And it has some of that now, but it's really tender.
It's almost like you don't even need a knife.
-No.
Oh!
-Orange is a perfect complement to this, isn't it?
-It really is the orange.
And there is still some of that licorice flavor, but it's so, so soft.
Spectacular.
-Perfect.
-Everybody is gonna love this.
You're gonna love this, and you're gonna want to make this beautiful roasted fennel.
And it starts by tossing wedges of fennel with seasoned water.
Roast the fennel cut-side down under foil, and then remove the foil to get that fennel nice and browned.
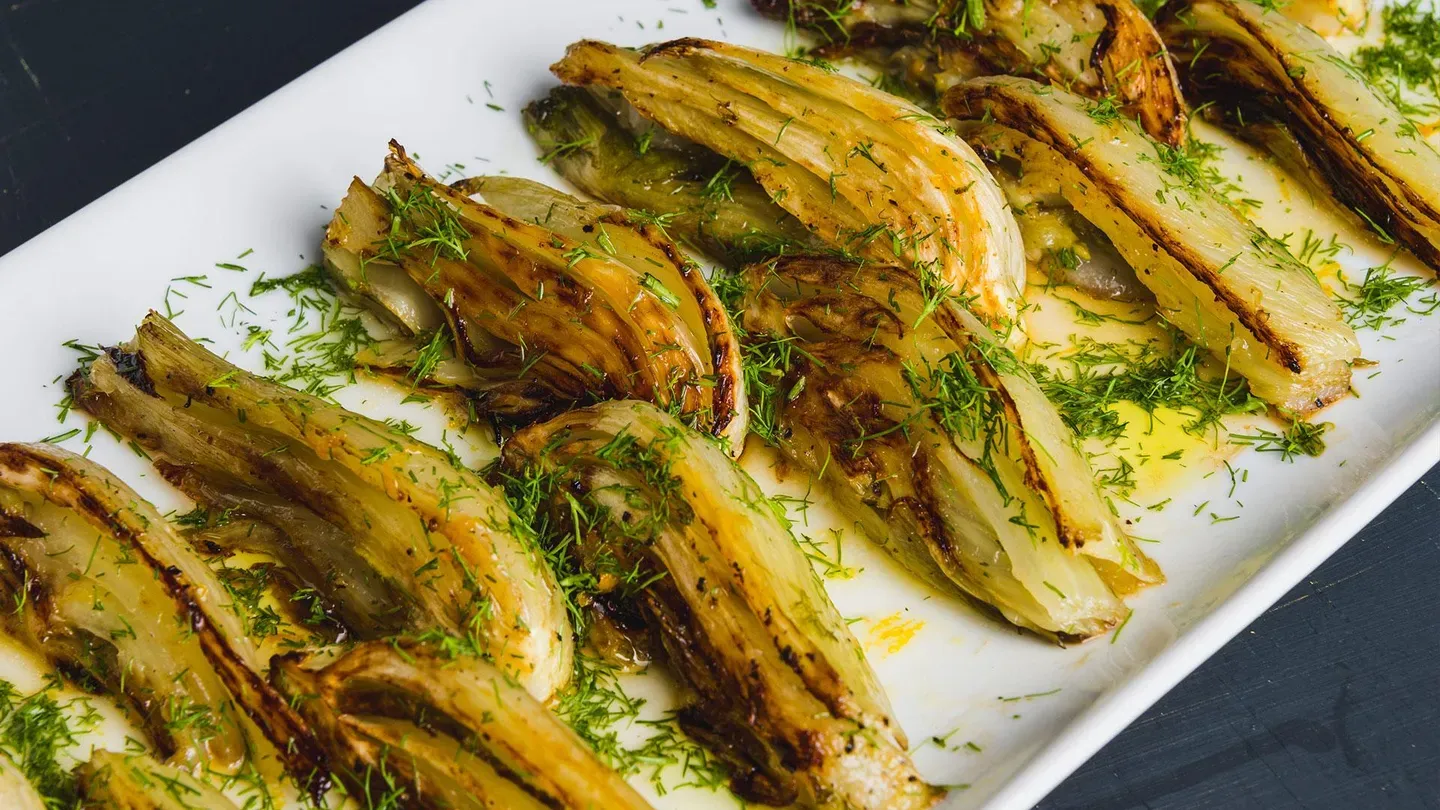
And don't forget to finish with a flourish of a flavorful dressing at the end.
So there you go from "America's Test Kitchen," beautifully roasted fennel with orange-honey dressing.
You can get this recipe and all the recipes from this season, along with product reviews and select episodes.
And those are all on our website -- americastestkitchen.com/tv.
Mmm.
I think maybe a second sheet pan might be in order.
-[ Chuckling ] Visit our website, where you can sign up for our free e-mail newsletter for even more of the recipes and stories you love from all of our cast and cooks.
AmericasTestKitchen.com/TV.
From the cooks and editors of "America's Test Kitchen," Cook's Illustrated Magazine has been all about the why and how of cooking for over 30 years.
Get a year of award-winning reporting, science-based discoveries, trusted reviews, and more.
The cost is $19.95.
That's 63% less than the cover price.
To subscribe, scan the QR code on your screen, or visit CooksIllustrated.com/ TVsubscribe.
"America's Test Kitchen" is brought to you by the following.
Plugrà European-style butter was created for all chefs, cooks, and bakers.
Slow-churned with 82% butterfat for a smooth texture and more pliability for flaky crusts.
Plugrà -- from professional kitchens to your home.
Sailing with American Queen Voyages brings you to mighty rivers and unique expeditions, where passionate explorers can discover the continent of North America.
You can learn more about our voyages at AQVoyages.com or contact your travel advisor.
Sur la Table, where you can discover an assortment of provisions for your next meal or gathering, from cookware and tools from a wide variety of kitchen brands to hands-on cooking classes.
Visit us at surlatable.com.
♪♪ ♪♪ ♪♪ ♪♪ ♪♪ ♪♪


Support for PBS provided by:
America's Test Kitchen is presented by your local public television station.
Distributed nationally by American Public Television